Get Started
A quick start guide to integrate the Player Make SDK into your Unity project.
Prerequisites
You should already have a skin creator setup for by a member of our team, accessible on a public URL (like https://gamer.playermake.com/creator/demo).
You should already have saved at least 1 custom design in your skin creator.
You should have been given your project ID, or have access to the Player Make Developer Portal where you can find your project ID.
Step 1: Install the SDK
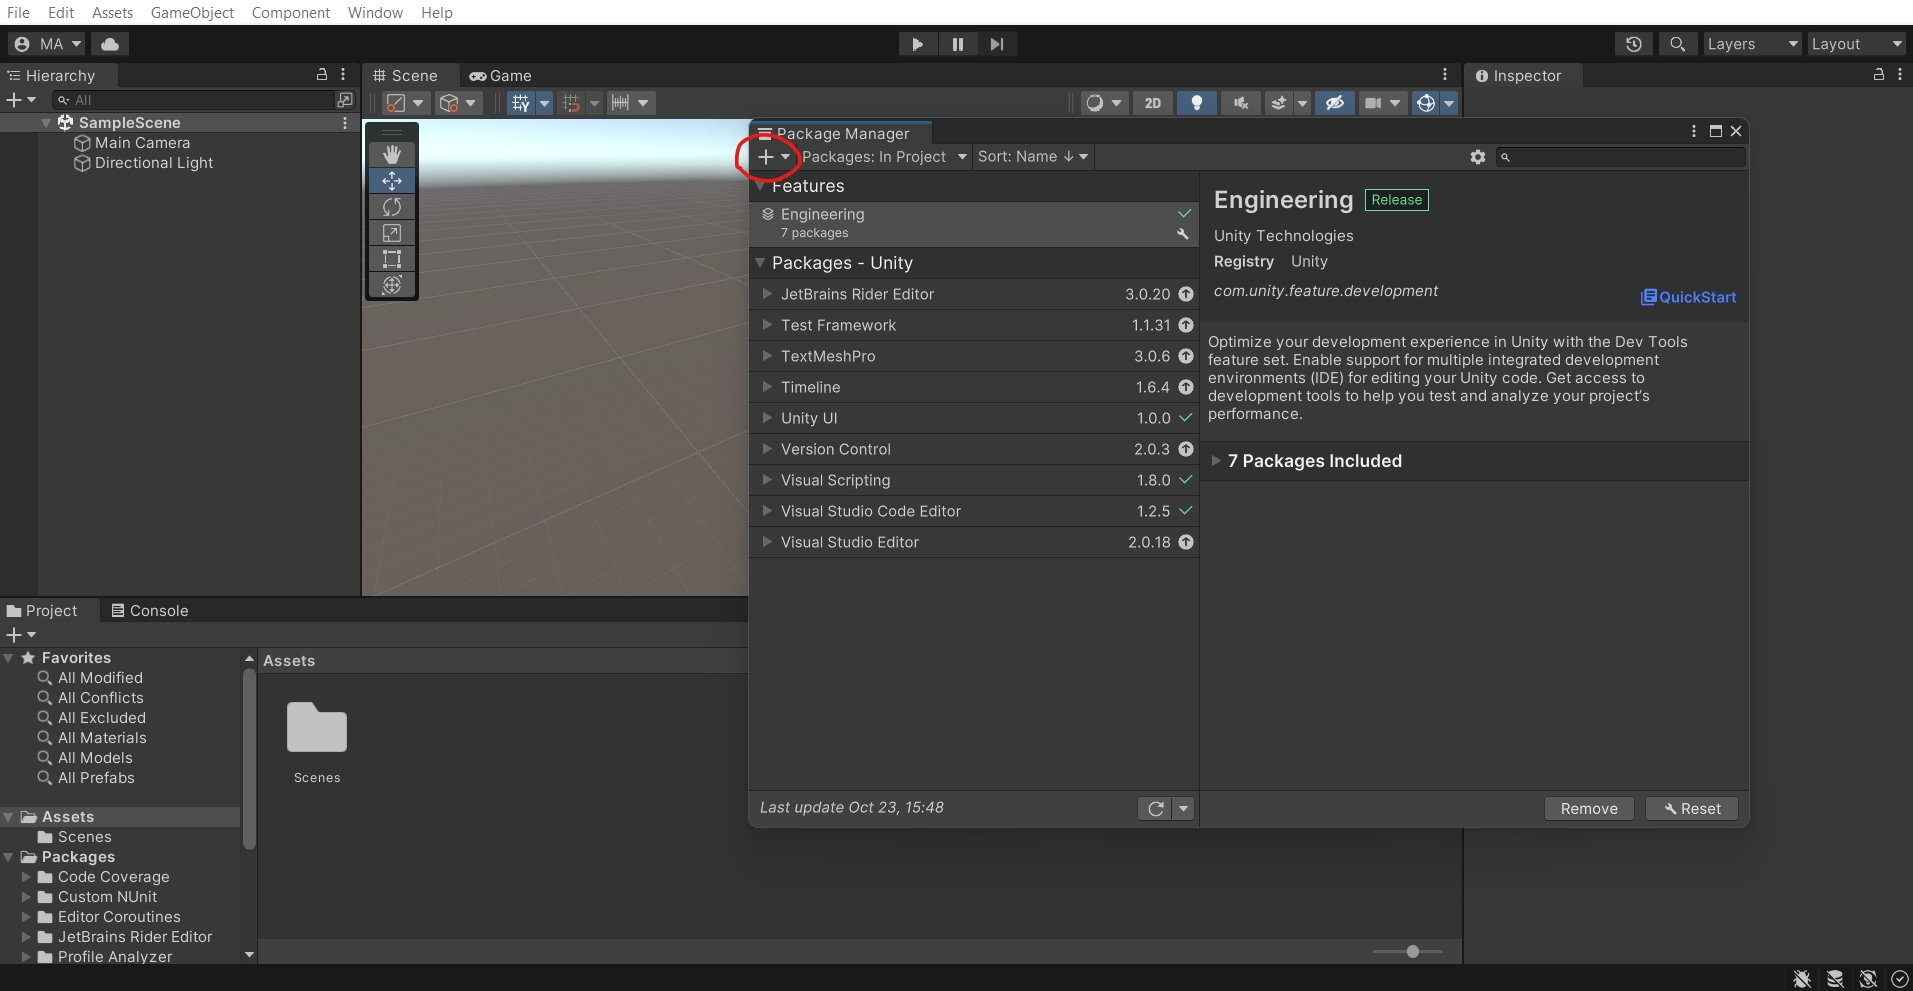
You can visit our Unity SDK GitHub releases page to access the latest release and install it via the Unity package manager. Within the Unity Package Manager you will see an 'Install from Git url' option when you click on the + icon in the top left. This is the option that you should select, and you should use the url specified on the SDK release that you would like to install from the link above.
If you are unable to install the package from the git url because it says that git is not installed, then you will need to manually install git onto your machine. You can find a link to that here.
Step 2: Install public creations sample
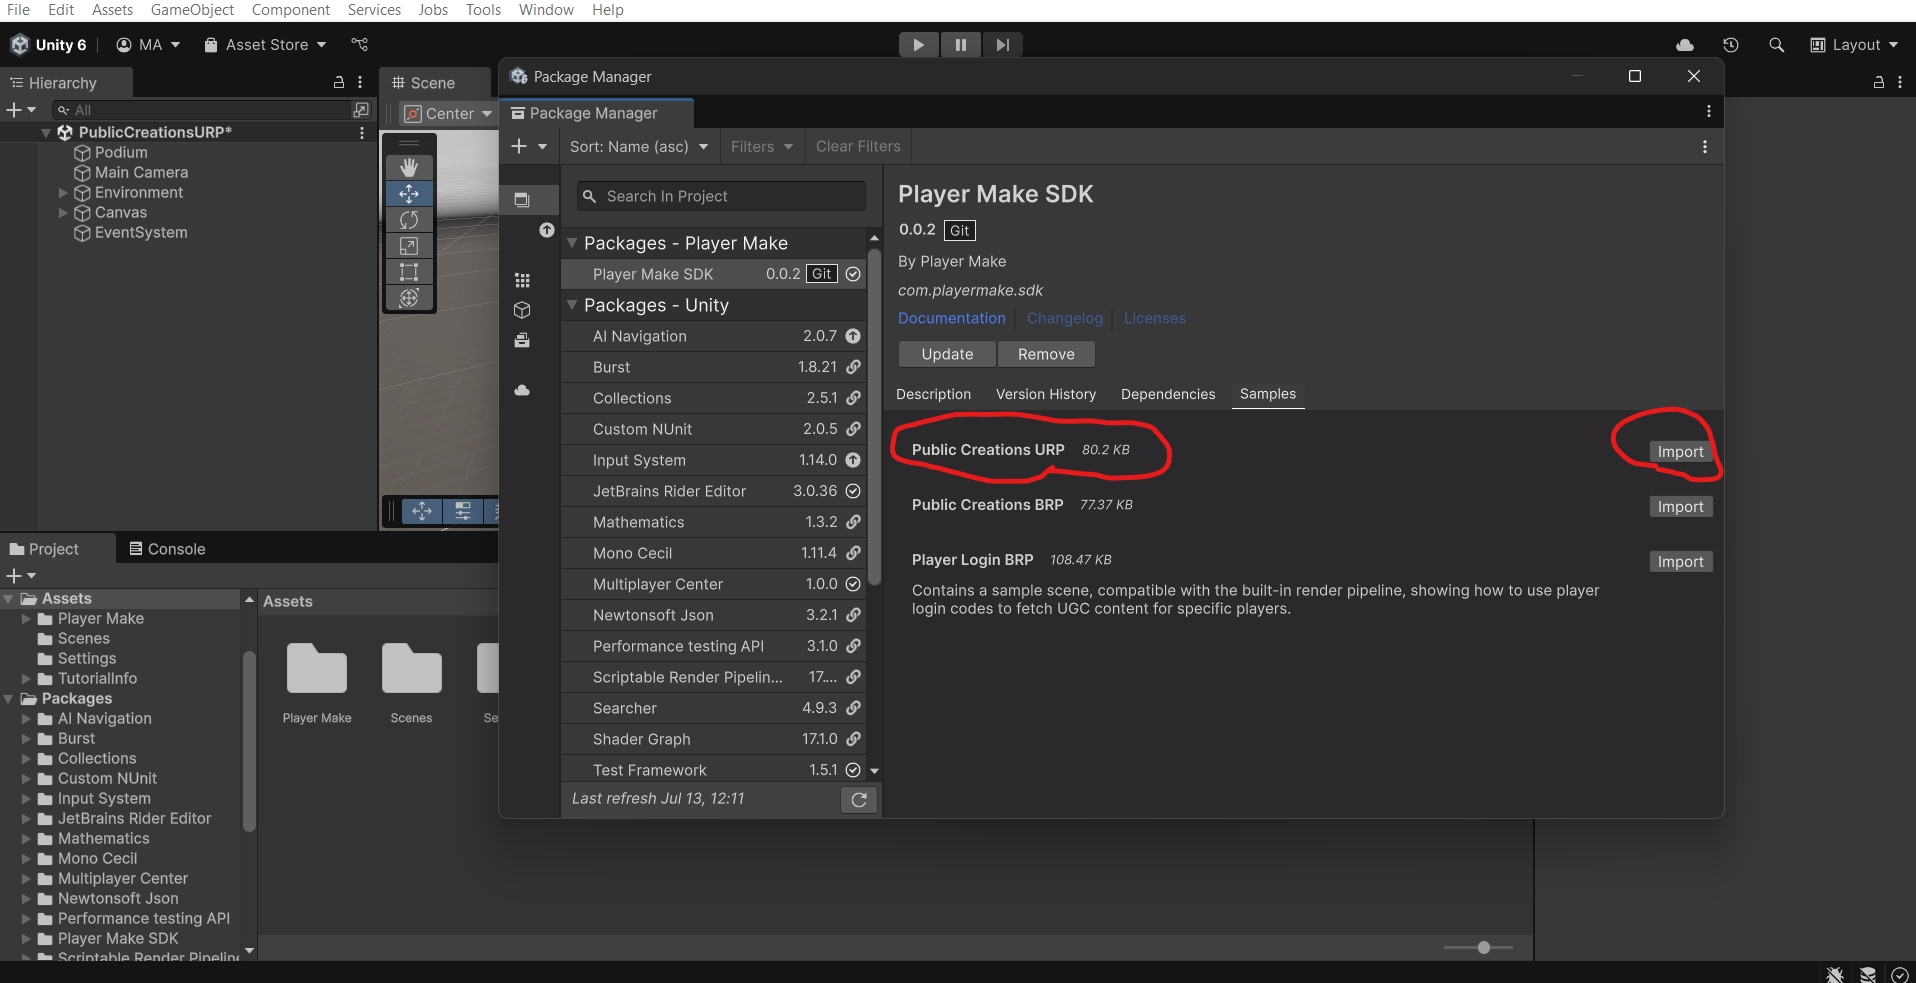
Click the import button as shown below, and import the Public Creations sample into your project for the specific render pipeline you are using (URP or BRP). This sample shows you the simplest Unity integration of Player Make.
Step 3: Get your Project ID and API Key
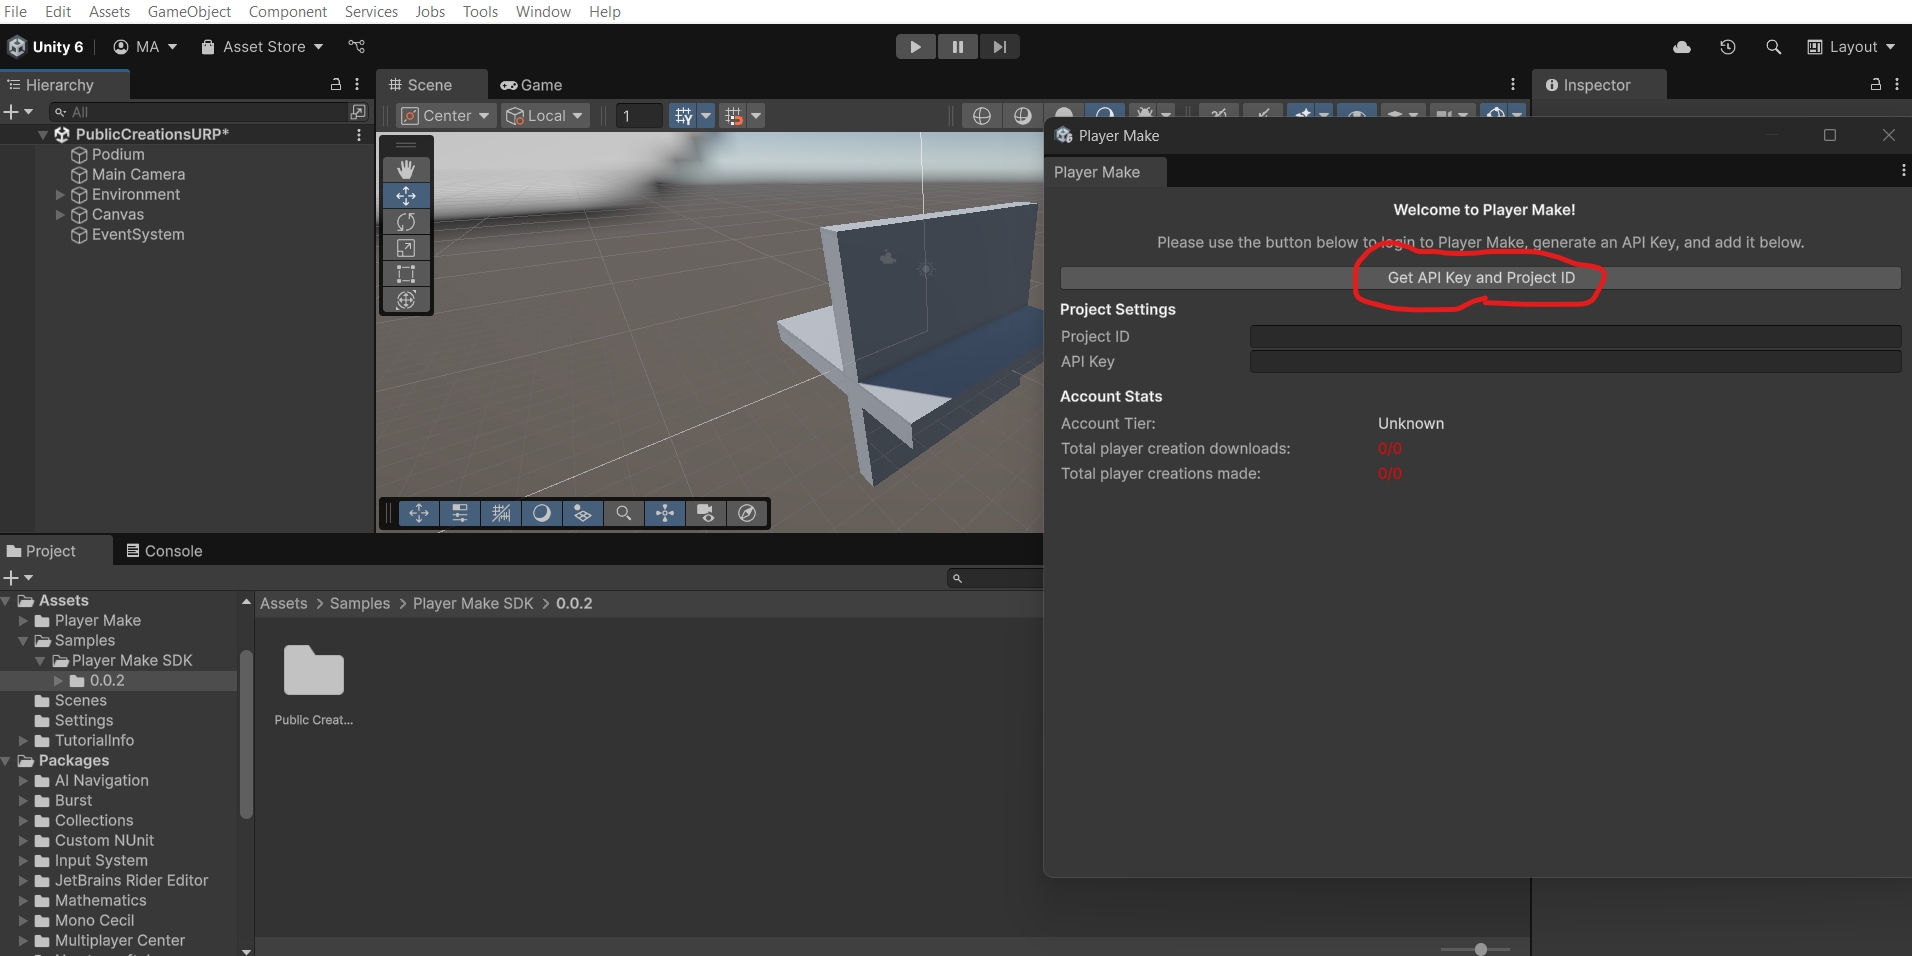
Inside Unity, from the top bar click on Tools > Player Make to open the Player Make setup window. Once it is open, click the 'Get API Key and Project ID' button to log in to your account (or create one) and to generate an API Key.
Step 4: Add your Project ID and API Key into Unity
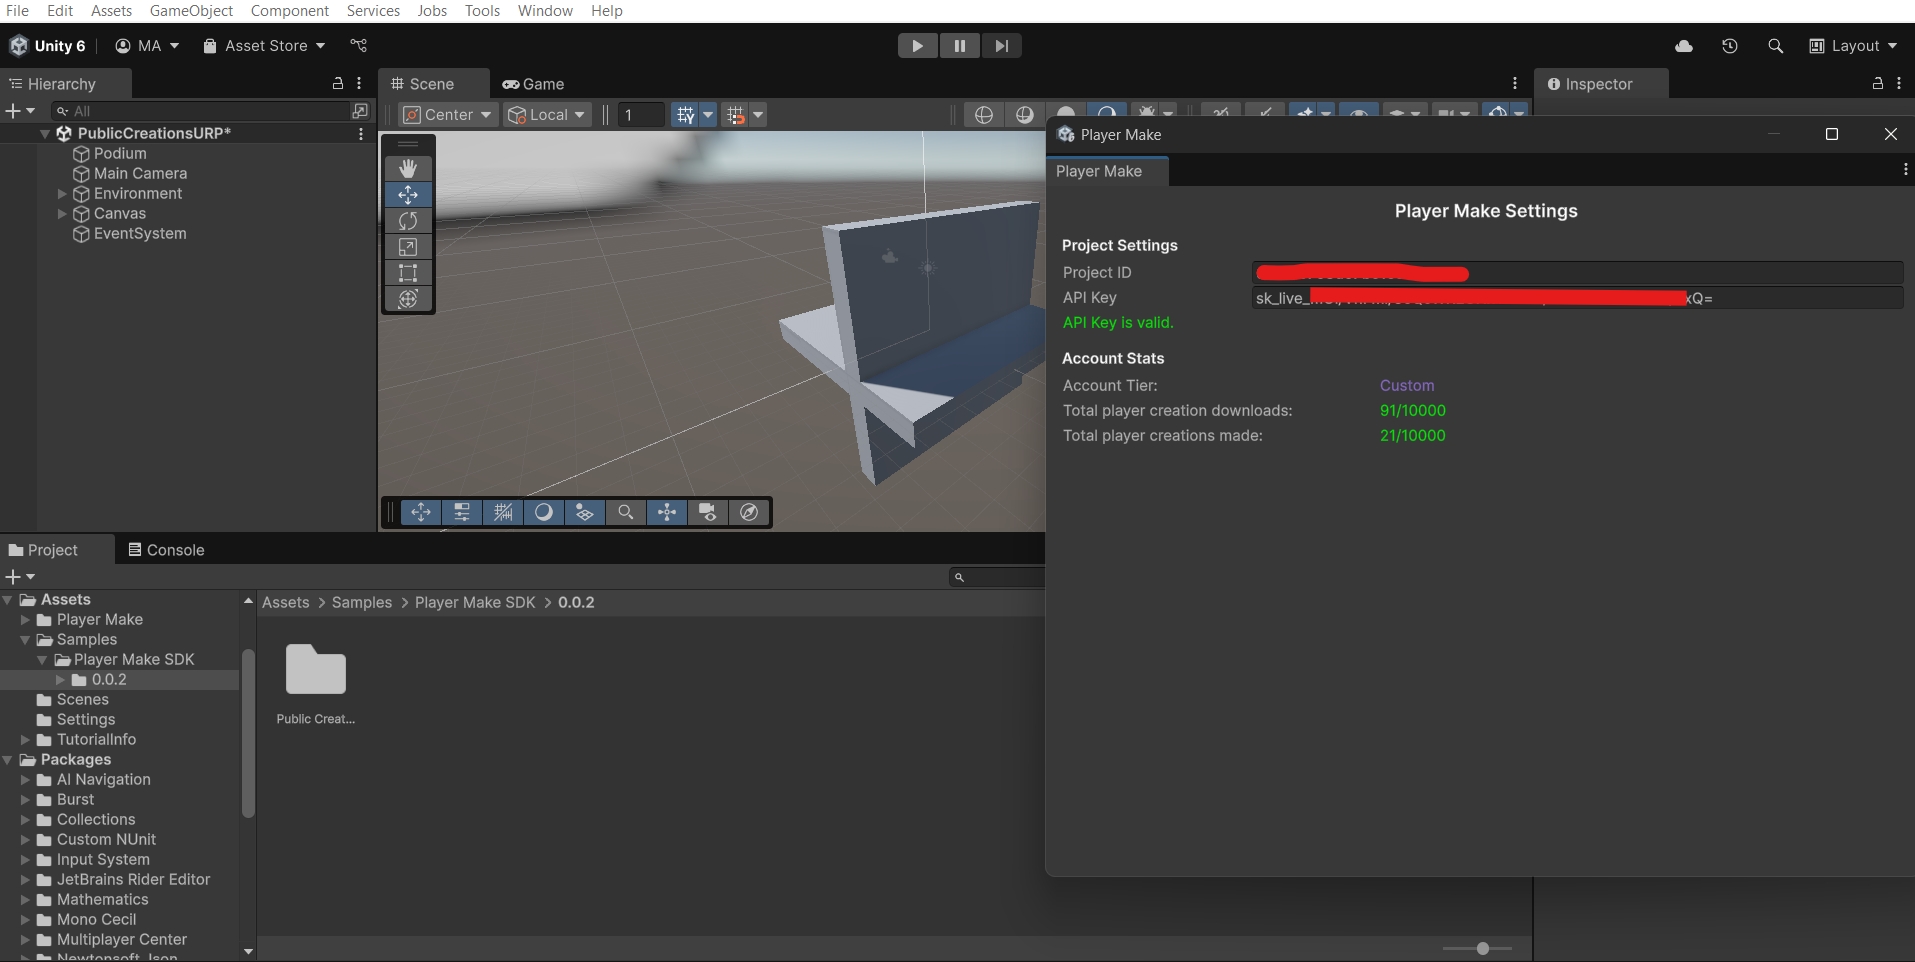
Taking the credentials from step 4, please add your project ID and API Key into Unity. You will know when the API Key is valid, as the stats should go green and the tier should no longer say 'Unknown'.
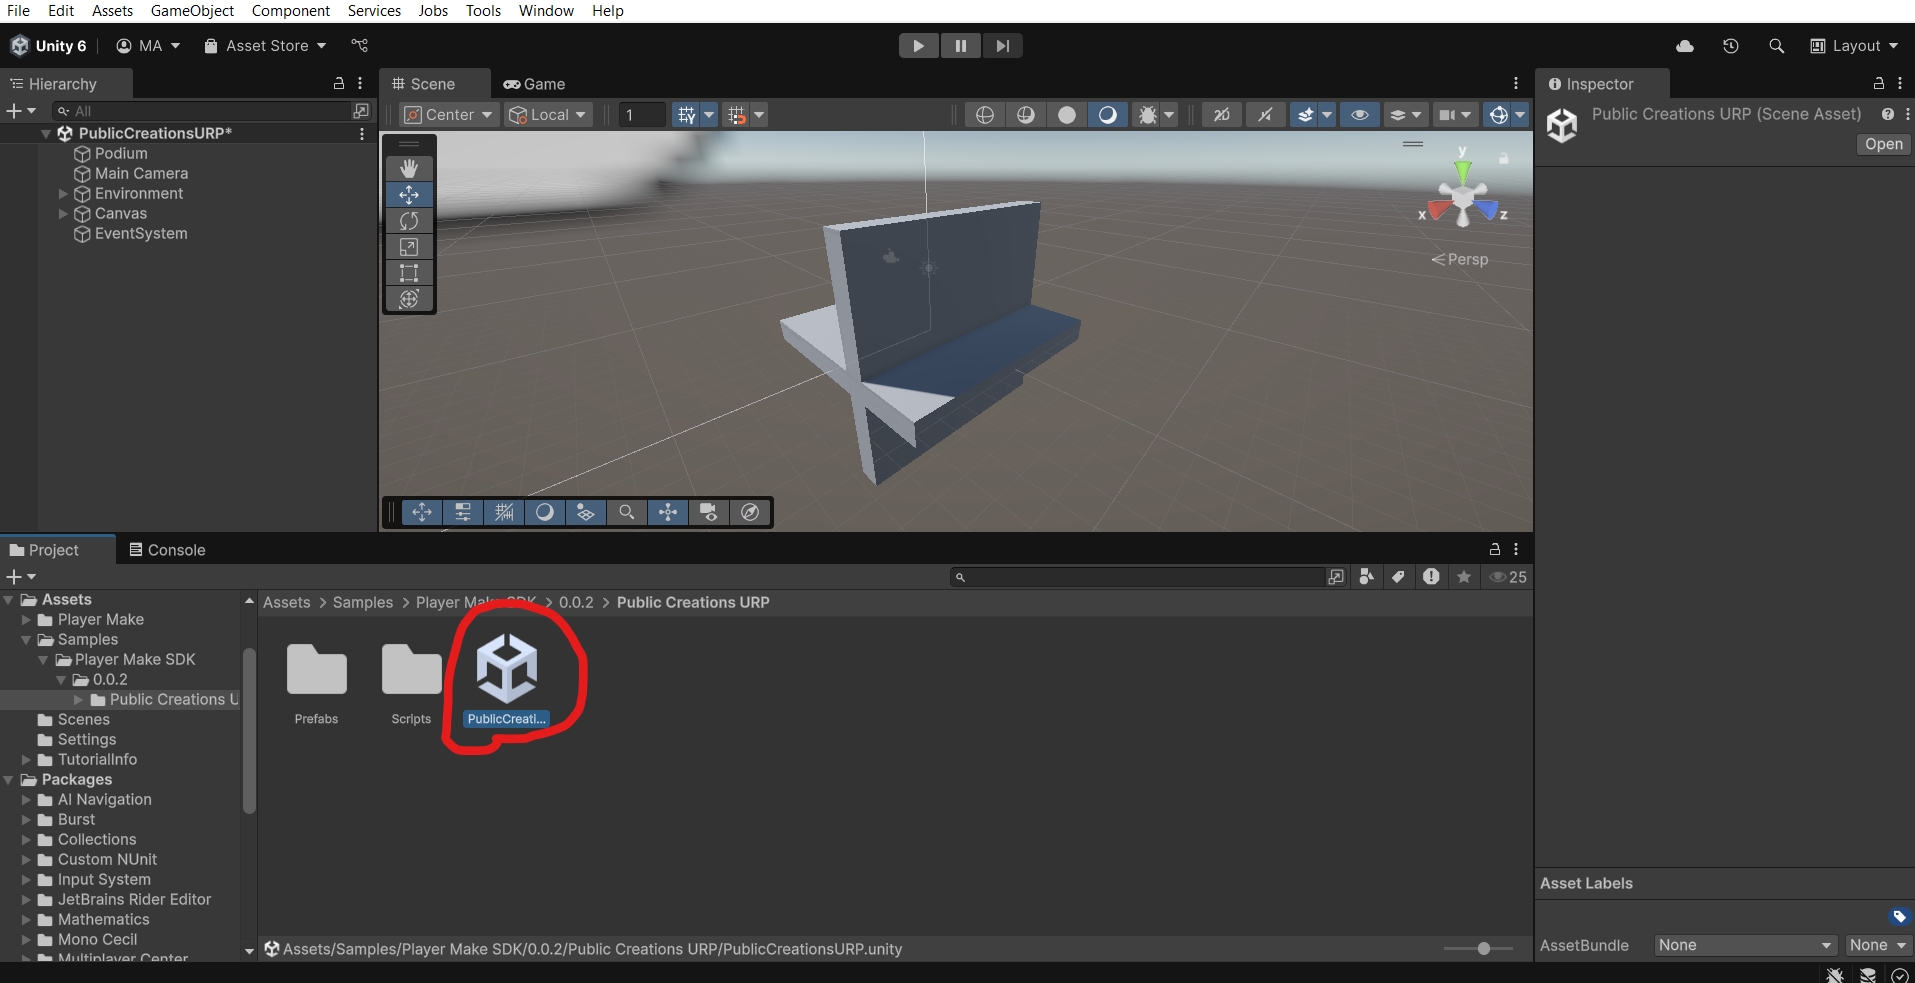
Step 6: Run the Public Creations sample scene
From the imported Samples folder, find the Public Creations scene, open it and run the scene. You can click on the button in the bottom right to choose a creation to load in your Unity scene.
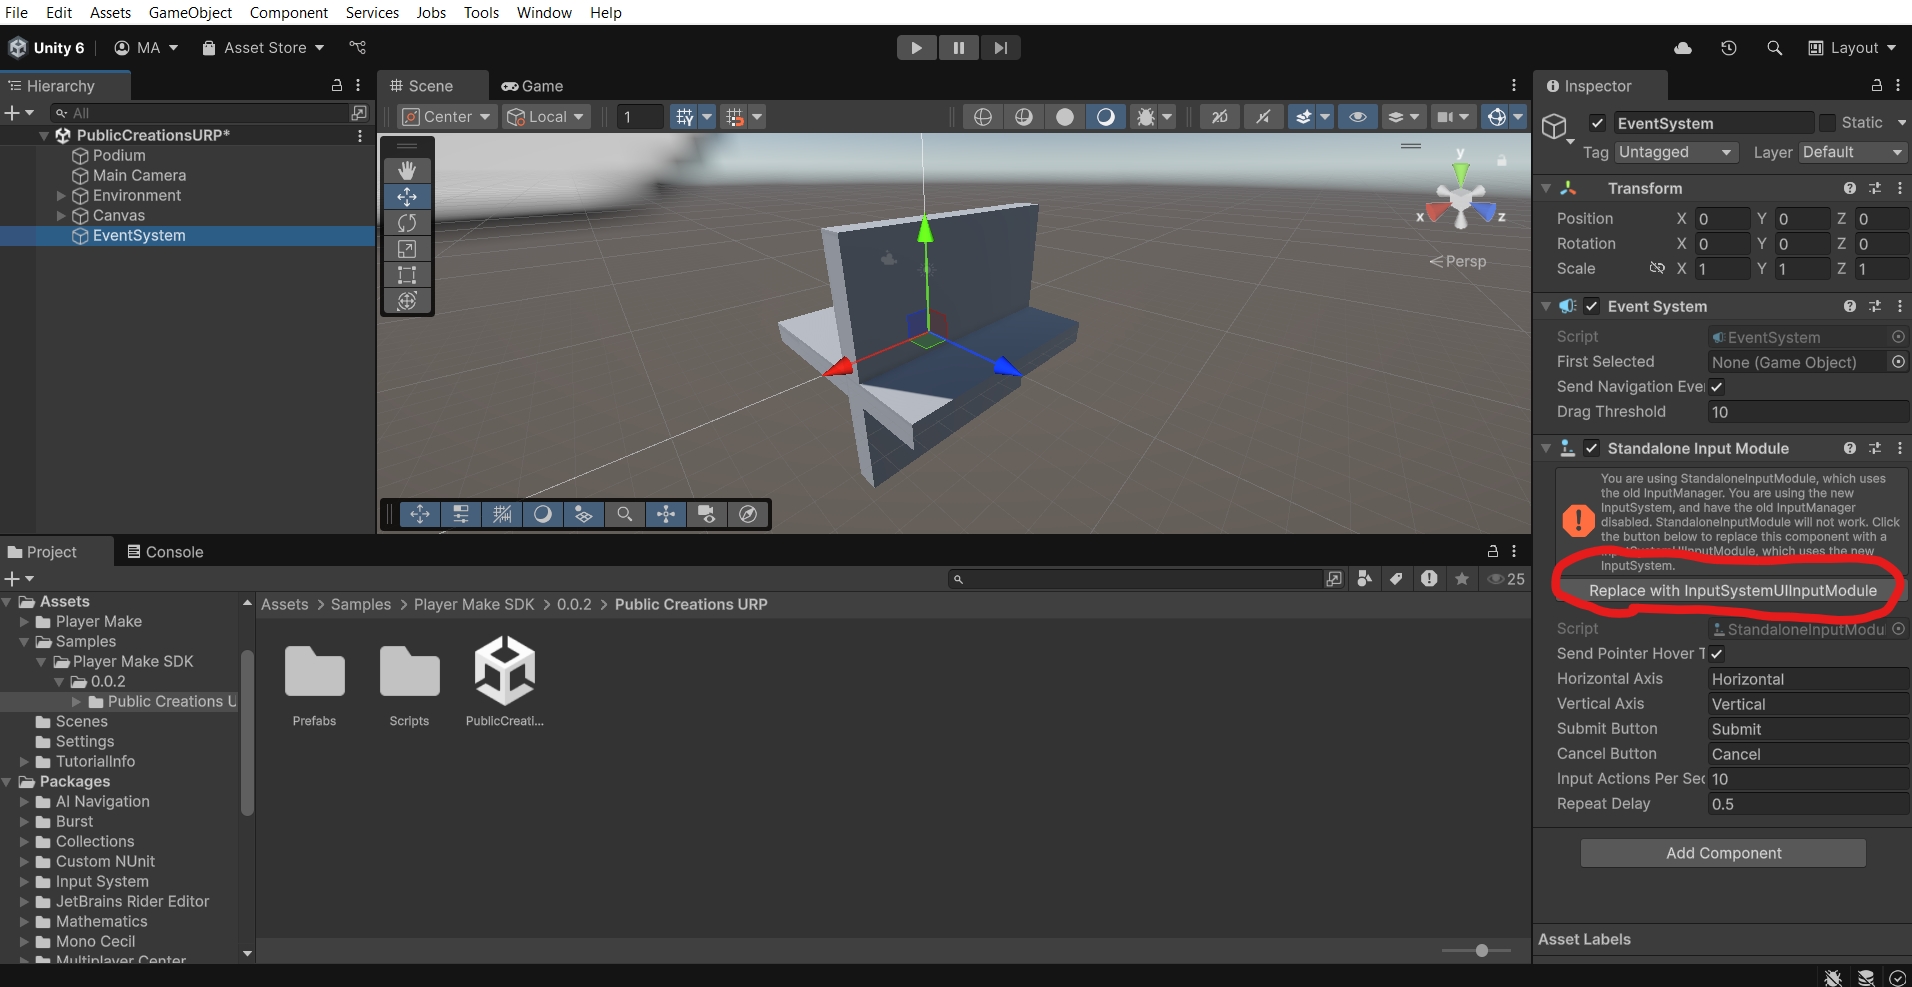
If you see errors in the console related to an input system after starting the example scene, this will likely be because you're using Unity 6 and the new input system. To fix this either:
Click on the EventSystem object in the scene and click the 'Replace with InputSystemUIInputModule' button to upgrade to the new input system
Go to the player settings and switch the supported input systems to include the legacy input system.
Conclusion
At this stage you now have a working Player Make integration!
Feel free to explore the Public Creations Sample more, create new skins in your account to see them appear in Unity, or try out the other samples.